Showing posts with label Section 43 - Engine Installation. Show all posts

Wednesday, August 26, 2020

Other (avionics install., cont.); 43 - Engine Install (sensors); 45 - Cowling (inlet ramps); 48 - Exhaust (exhaust pipes and scat tubes)

During the last ~2 weeks I bounced around a bit, depending on what needed to be accomplished (and to afford time for curing/drying/cogitating/omphaloskepsis).  Nothing earth-shattering, except to mention that ALL the remote boxes have either been installed or holes have been drilled for their eventual installation. Having so many remote boxes made it quite a challenge to locate everything behind the panel - but they will all fit.  Specifically, I accomplished the following:  

- drilled a few holes to attach Garmin boxes; lots of planning; modified left avionics shelf for GAD29 and IBBS attachment

- installed GEA24, GAD27, GAD29, IBBS and left avionics panel

- installed CO detector, identified and routed many loose wires through firewall passthroughs; took off upper and lower cowl, and locked remaining camlocs 

- uninstalled GAD29, IBBS, and 4 connections to GEA24; drilled 4 holes for main power bus connector and attached connector; reattached aforementioned items

- sanded inlet ramps, epoxy/flox/micro of aft edges (will smooth out so baffle rubber will close neatly around the prior gap)

- sanded epoxy/micro on upper cowl; bondo-filled all holes holes and sanded (3x repeated); coated all sanded areas with light layer of epoxy

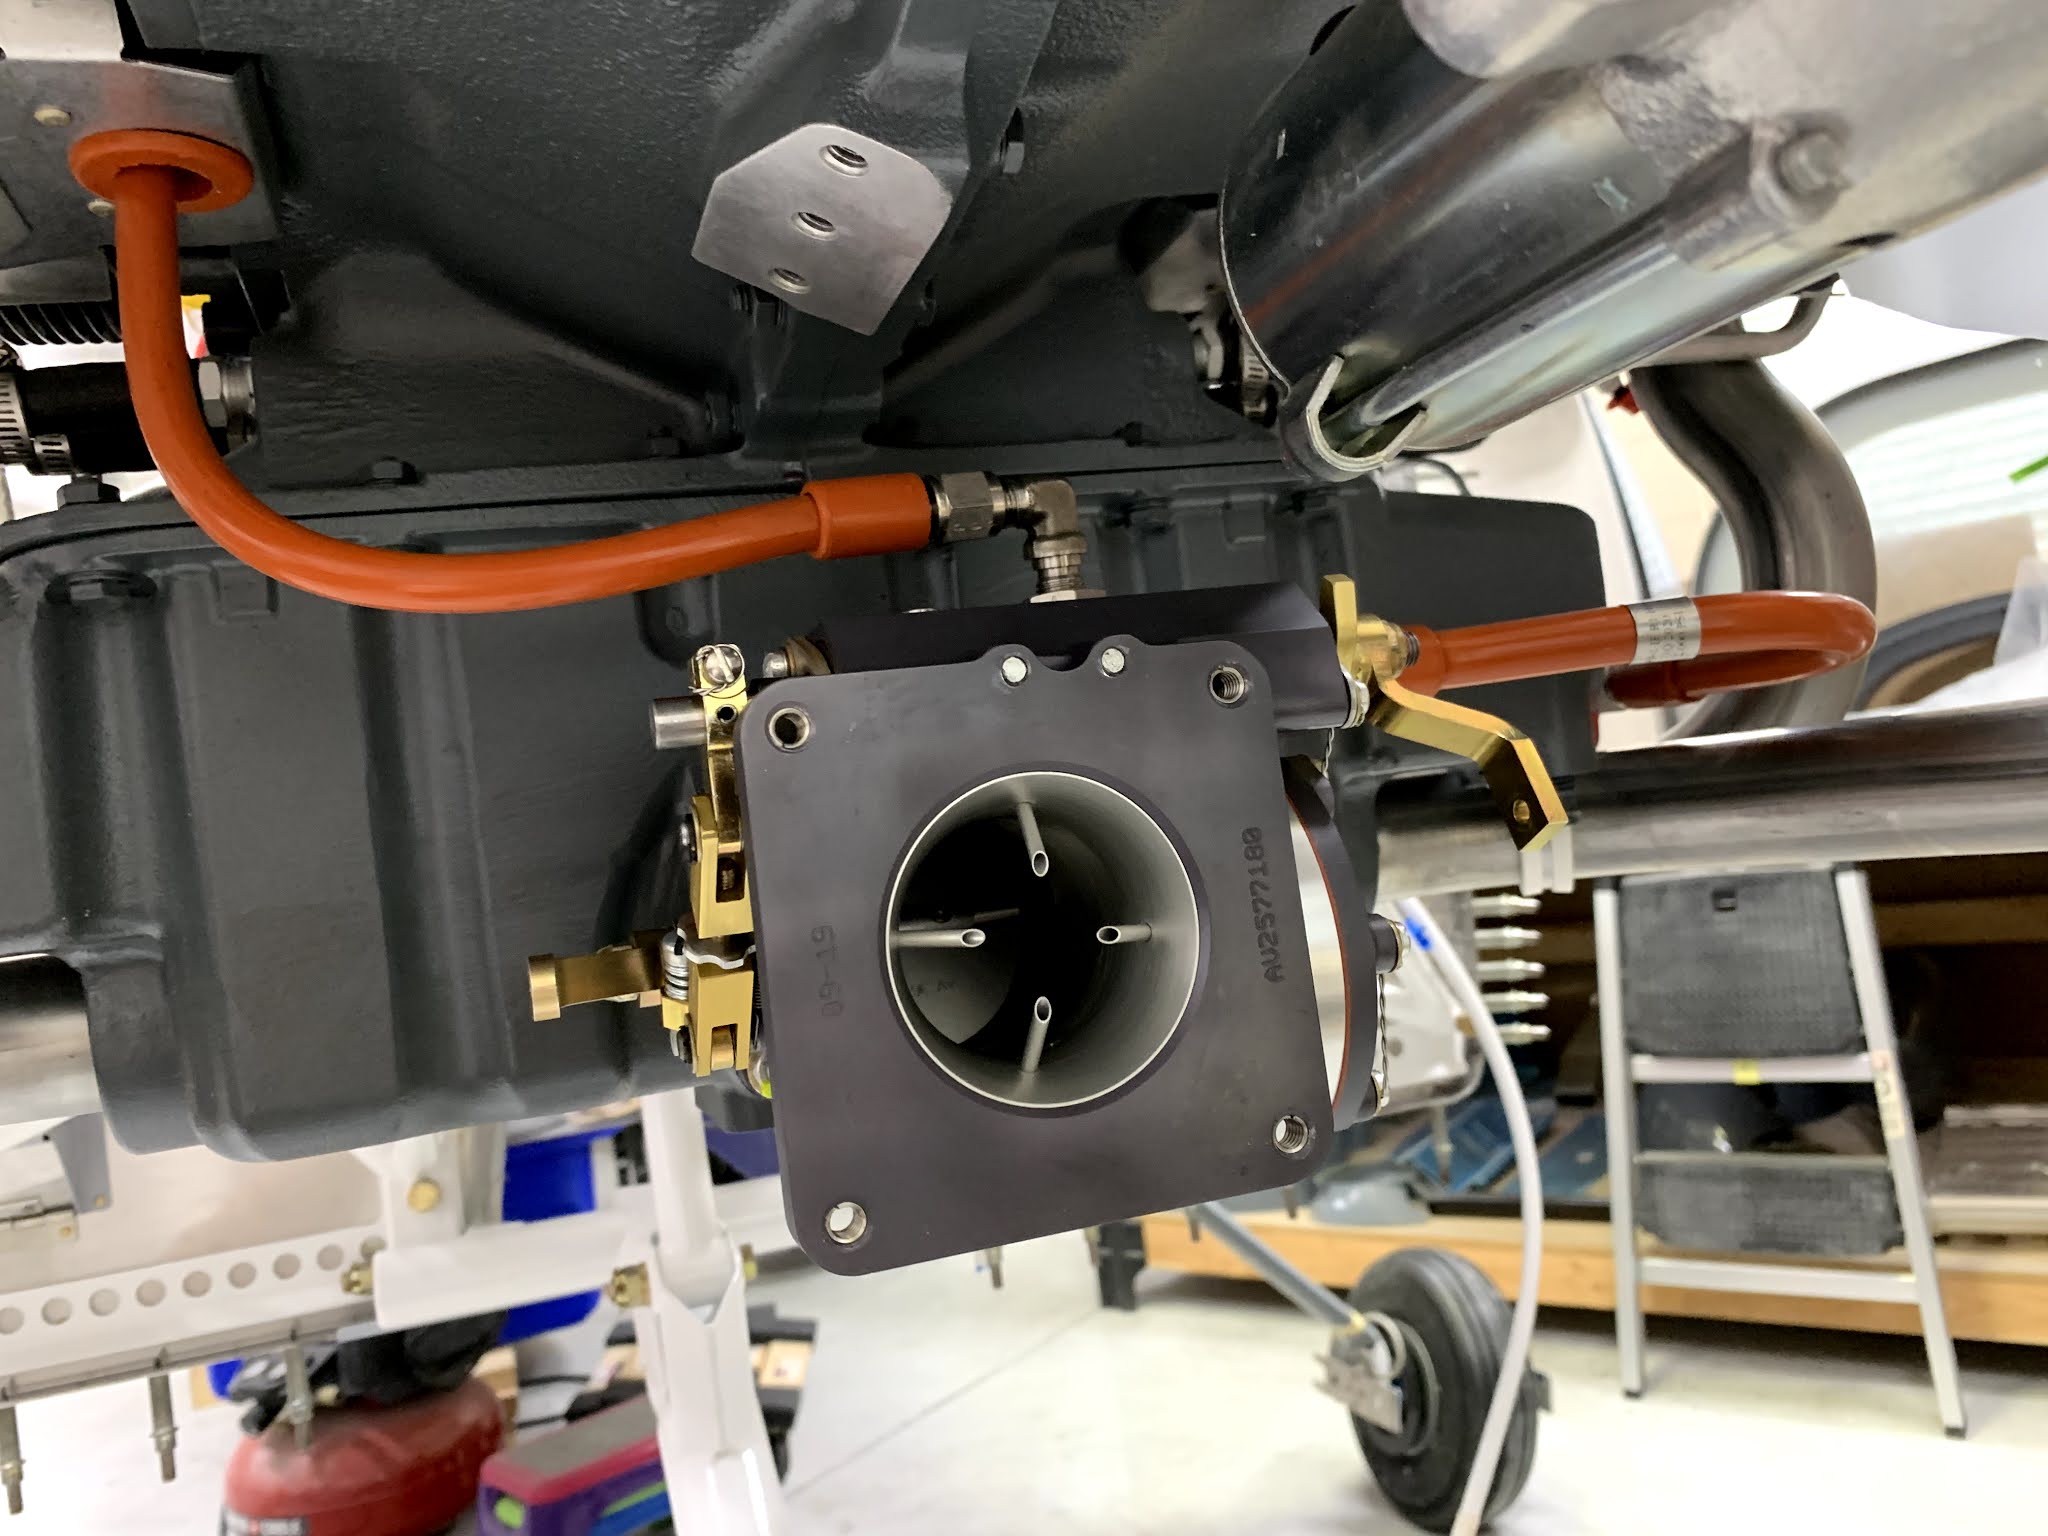
- installed fuel pressure sensor and manifold pressure sensor; completed a few odds-and-ends

- started installing the exhaust pipes - installed the hanger for tailpipe, and placed and loosely attached the aft and forward exhaust pipes (used nickel anti-seize paste at slip joints)

- finished installing exhaust system; torqued flange nuts 16 lb-ft; drilled out 2 LP4-3 rivets from right heat vent and installed cover w/red RTV

- prepared and installed heat muff assemblies; prepared scat hoses for vents (cut, trimmed, RTV’d the length of each hose); organized hardware

- Installed vent t-splitter that directs hot air to left/right cabin floor vents; installed a few scat hoses, while leaving others off for access (for fuel line penetrating cabin - prosealed the fitting to the firewall, but will need to final-torque nut and fuel line later)

View behind the panel - damn, that's a lot of wires!  Avionics shelf was fabricated (next pics) to hold the IBBS battery (black rectangular box in the center) and GAD29 (underneath shelf; not shown):

Monday, July 27, 2020

43 - Engine Installation (misc. install.); 44 - Spinner & Propeller (installed prop.); 45 - Cowling (installing Skybolt camlocs)

This is my 100th blog entry, and it has a lot of small tasks related to the Finish and FWF kits.  Specifically:

- installed fuel servo; loosely installed a lot of adel clamps to engine and mount; attached starter cables to starter; worked with Steve from Aircraft Specialty to install VA-102 hose (needed to clock the fitting on the fuel pump differently than Van’s instructions); installed fuel flow red cube and hoses/connections that lead from fuel pump to fuel servo to fuel spider; installed VA-139 only to fuel pump (needs to be loose now, so I can install exhaust system later)
- installed throttle cable bracket; installed alternator and belt; installed a few more adel clamps
installed spinner plate assembly to propeller; installed propeller to engine (final-torqued and safety-wired); installed forward spinner bulkhead
- filed spinner openings to fit prop blades; sanded areas that contact the spinner bulkheads, and then brushed on thin layer of epoxy
- Prepped cowling; attached upper cowl to fuselage to measure distances for Camloks; started figuring out how Camlocs are installed
- trimmed camlocs, remeasured camloc distances, and match-drilled one half of them to fuselage
- match-drilled remaining camlocs, and removed, deburred, countersunk, and riveted them to upper fuselage; bent camlocs so upper cowl sits flush; started fitting of upper cowl to fuselage, including measuring and trimming of aft edge (lots of remove & reinstall steps)
- finished filing aft edge of top cowl (tight fit of 0.001-0.032”, per painter, so his crew can finish down to spec); match-drilled #30 holes into camloc drill guides using Mark A.’s “3 line” technique; upsized holes to 15/32”, sanded w/ dremel to just fit the grommets; attached temp o-ring retainers to grommets; riveted receptacles to flanges and temp. screwed all camlocs with the pins still engaged (i.e. “unlocked”) - all top cowl camlocs seem to work well!
- installed camloc flanges on the sides and lower part of fuselage

Installed fuel servo, and Aircraft Specialty Fuel lines with integrated fire sleeves:

Tuesday, July 14, 2020

40A - Gear & Engine Mount (nose gear & wheel); 46A - Leg & Wheel Fairings (intersection and nose gear fairings); 43 - Engine Installation (mounted engine to fuselage!)

The engine has been mounted to the fuselage!  All other crap I did the past two weeks was incidental to this major milestone - and thanks to Ken B., the install went quite smoothly.  Prior to that, I had received the nose gear leg and installed the nose gear and wheel, and did a bunch of composite work.  I'm really not a fan of fiberglass - almost a month of working on the 13 fairings for the wheels/legs and I'm still not quite finished. But, with the engine on, I'll be moving on to engine-related tasks for a while.  Here is what was accomplished during the past two weeks:

- installed nose gear leg and link assembly
- installed axle flange and nose fork, torqued the -24 nut until ~30lb of force felt per pulling with a fish scale (a little more than 26lb required, since will loosen over time); installed nose wheel
- removed intersection fairings and sanded/trimmed; floxed a lug to encase nut that attaches the training edge of each upper intersection fairing
- removed tape and excess flox from nut lugs; #27 drilled and #40 countersunk upper intersection fairings (attached to fuselage); removed main wheel fairings, and reattached halves with screws; drilled and deburred holes for nutplates in fairings; countersunk holes for nutplates
- figured out how to get fuselage into level flying position whilst having the nosewheel barely touching the ground; drew longitudinal center line on garage floor; marked standoff locations; aligned nose wheel fairing
- Cut slot in nose wheel fairing; aligned fairing in pitch; drilled bracket holes (magnet technique) and standoff pilot hole; tapped bracket holes; drilled standoff holes to just under 1” wide (will finish later, after - I received the proper screws to hold standoffs - was using shorter screws with washers for the initial fits); floxed brackets to nose wheel fairing rear
- Final drilled nose wheel fairing to brackets; installed nutplates to brackets; primed brackets; attached brackets to wheel fairing and attached to nose wheel; final fit of fairing (needed trimming to clear nose gear leg through the wheel’s range of motion)
- trimmed and aligned nose gear leg fairing; drilled nose gear leg fairing and hinge
- deburred, countersunk and riveted hinge halves to nose gear leg fairing; started initial fit of fairing (trimming, fitting, trimming again…)
- drilled #19 holes in fairing to attach to nose gear leg; attached nutplates to nose gear leg; final-trimmed fairing
- installed last oil fitting; cleaned and prepped workshop to install engine; installed engine onto dynafocal mount (w/ Ken B.!)

Floxed intersection fairings, installed on fuselage and wheel pants, and then removed them to trim:

Saturday, June 20, 2020

45 - Cowling (trimmed); 43 - Engine Installation (random stuff); 38 - Canopy & Window (latch system); 40A - Gear & Engine Mount (installed legs, wheels, brakes); 46A - Leg & Wheel Fairings (main gear nearly complete)

Another couple weeks of searching for items to complete, while I wait for Van's to deliver backordered items (COVID-delays, so understandable). Fortunately, they sent me the main gear legs and the latch torque tube, so I could get another week of work done toward installing the engine.  BUT, I still need the nose gear and link before installing the engine ... oh well, this forces me to continue picking at the fiberglass bits. Here are the details:

- clamped cowl halves together and started fine-trimming the spinner hole and ducts; lots of small areas to sand to get all four areas to fit nicely
- finished fine-trimming of spinner hole and air ducts; drilled #40 holes to cleco (for now) the area around the spinner; cleaned up for next project (dust everywhere!)
- removed fuel hose that goes from fuel servo to fuel spider to take measurements and pictures for Aircraft Specialty - they will fabricate an integral firesleeved hose for me, and hopefully include in their catalog for other RV-14A builders!  
- received backordered powdercoated torque tube from Van’s; installed canopy latch system; tested latch action inside and out - works just fine!  
- installed main gear legs; attached main gear leg axles (wife helped); checked alignment of axles (toe); installed main wheel and tire assemblies
- installed brakes and brake lines from fuselage to calipers (Aircraft Specialty!)
- trimmed and deburred oil door and oil door hinge
- prepped main gear fairings; fit and trimmed main gear fairings so the halves mate as precisely as possible
- drilled #30 main gear fairings for brackets and found that one aft fairing was mis-dimpled at factory; repaired drill holes in aft fairing using epoxy-flox; drilled left fairing and cut gear leg clearance hole; attached nutplates to fairing brackets; installed one bracket temp. on left gear/wheel
- attached other 3 brackets (temp) to gear/wheels; modified left wheel fairing halves to have 5/8” clearance for tire
- finished fitting right gear fairings to each other; #40 match-drilled; cutout gear leg clearance hole; ensured all could be installed on right wheel/gear; floxed all 4 brackets to gear fairings and loosely attached with screws (did this process off the plane, since there was no way to verify proper seating of bracket if on plane)

Finished trimming and fitting the forward parts of the top and bottom cowls - the two halves fit well together, so I drilled the requisite #40 hole: 

Sunday, June 7, 2020

43 - Engine Installation (misc.); 44 - Spinner & Prop (spinner plate and spinner cutouts); 45 - Cowling (trimmed to scribe lines)

In an effort to keep busy while I await a number of backordered parts from the Finish and FWF kits, I bounced around between tasks for the engine installation, spinner and propeller, and cowling.  Fortunately, a fairly heavy (~60 lb) shipment from Van's is en route and should be here on Wed - and I hope these are the powder-coated parts that I need to finish the canopy latch mechanism as well as the gear legs so I can put her on her feet.  The latter is needed before I attach the engine, which would be the next major step in (hopefully) a couple weeks.  Meanwhile, here is what I accomplished since the last post:

- attached a bunch of steel fittings to the engine; torqued nuts and attached more wires to the starter solenoid
- primed and attached manifold pressure sensor bracket; separated, deburred and riveted prop governor bracket assembly
- powder-coated steps (H&R Powder Coating in Orlando)
- figuring out how to install B&C backup alternator (i.e., hard-to-reach nuts), as well as the electrical connections to the e-mag - VERY tight quarters for both
- installed B&C backup alternator (torqued 3 nuts at 108 in-lb); what a pain in the ass 4th nut - need another tool to properly torque that nut; EDIT - got proper vacuum pump crow’s foot and wobble extension and it was easy to torque that 4th nut
- drilled #30, and cut spinner plate assembly with pneumatic nibbler and pneumatic belt sander
- riveted spinner back plate and doubler, and deburred edges; removed cutout sections of spinner;
marked scribe lines; started trimming cowl at the spinner and air-intake areas
- trimmed to scribe lines for all areas except the aft lateral lines on the bottom cowl; test-fit to determine interference in the front section (will need to trim a little more)

Finished installing the remaining wires to the master relay and starter solenoid.  After reviewing Ken B.'s and Turner B.'s installations of their alternator fuses and G3X shunt, a couple of these nuts will need to come off to accommodate the starter switch wire and main power switch wire. I'll deal with that once I receive the panel.


Monday, May 25, 2020

38 - Canopy & Window (complete); 39 - Seatbacks (nearly complete); 40A - Gear & Engine Mount (misc. tasks); 41 - Wing Attach (misc. tasks); 42 - Miscellanea (ready for paint); 43 - Engine Install (misc.)

Big news - the engine arrived this week! What a beaut - now, I just have to figure out how to prep it prior to mounting it to the fuselage.  Prior to that, I need to attach the gear ... but there's been a COVID-induced issue.  I've been waiting on a number of parts from Van's - essentially all the larger powdercoated parts in the finish kit (incl. gear legs), as well as the exhaust system for the engine.  After contacting them, COVID has hit their suppliers of these parts, so there is no projected ship date.   To keep forward momentum, I am going through each section and doing any task that I can logically do out of the standard order, and thus why this post has tasks from 6 different sections.  Here is a summary:

- installed defog fans; installed rear seal and torqued zone 3 of canopy; fiddled with canopy latch mechanism - pins still too tight (need to work it in)
- fabricated seat backs - still need to paint, so didn’t final-install the pins
- bolted engine mount to firewall assembly (with help from wife)
- separated and primed gear attachment angles; primed and installed upper gear braces (not final torqued yet, since waiting on 3/8” torque wrench); trimmed washer for nose gear leg; primed gear attachment bars
- final-drilled #17 holes in wing root fairings
- elevator pushrod assembly and priming; wing root fairings deburred and lower fairings bent around 1.25” PVC pipe
- engine delivery and uncrating
- determined best way to lift engine
- dimpled holes and installed nutplates to seat ramps; deburred  edges of almost all parts in the Miscellanea section; riveted motor cover assembly; riveted aft cover and doubler; attached shoulder harness cables; primed stick boot doubler and battery box attach angle
- temporarily installed battery; installed master relay and starter solenoid; installed sender mount to firewall (without oil and fuel pressure sensors, since I’ll need those from SteinAir)
- figured out how to install a Michelin Airstop tube and tire on the Matco nosewheel (final tire pressure = 35 psi)
- installed tubes and tires on main wheels (final tire pressure = 40 psi); packed grease into all 6 bearings (2 per wheel); installed bearings in main wheel and tire assemblies; torqued upper gear brace; installed elastomer pad; installed nose wheel and tire assembly, using Matco axle, spacers, and bearings

Assembled engine hoist: