This is my 100th blog entry, and it has a lot of small tasks related to the Finish and FWF kits. Specifically:
- installed fuel servo; loosely installed a lot of adel clamps to engine and mount; attached starter cables to starter; worked with Steve from Aircraft Specialty to install VA-102 hose (needed to clock the fitting on the fuel pump differently than Van’s instructions); installed fuel flow red cube and hoses/connections that lead from fuel pump to fuel servo to fuel spider; installed VA-139 only to fuel pump (needs to be loose now, so I can install exhaust system later)
- installed throttle cable bracket; installed alternator and belt; installed a few more adel clamps
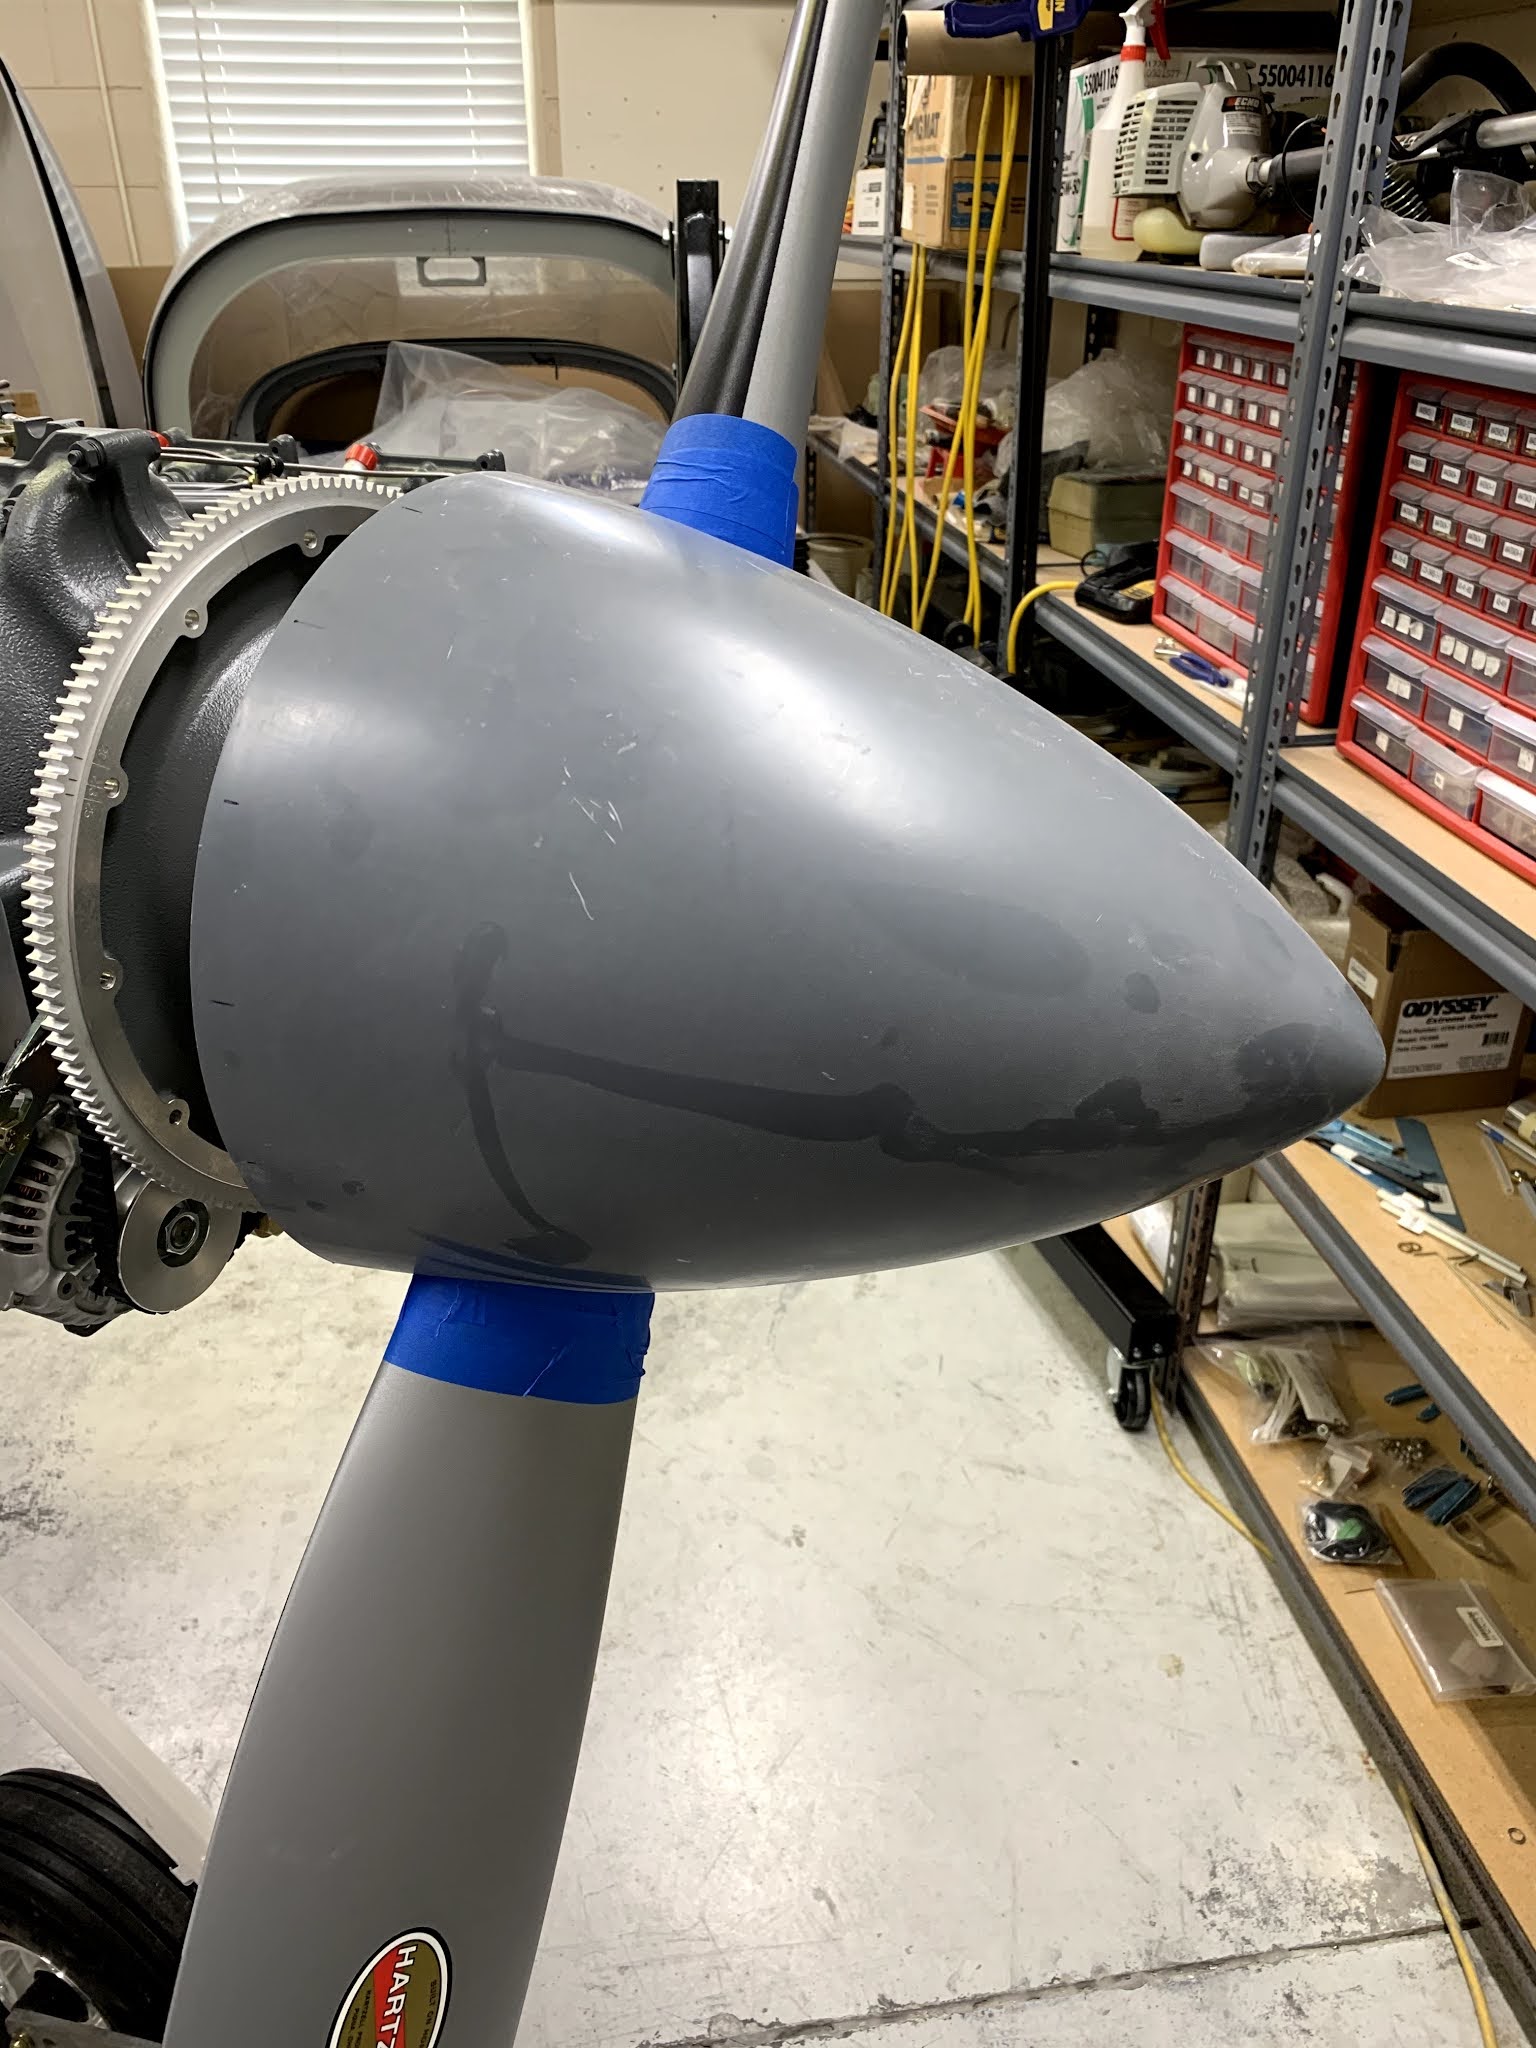
installed spinner plate assembly to propeller; installed propeller to engine (final-torqued and safety-wired); installed forward spinner bulkhead
- filed spinner openings to fit prop blades; sanded areas that contact the spinner bulkheads, and then brushed on thin layer of epoxy
- Prepped cowling; attached upper cowl to fuselage to measure distances for Camloks; started figuring out how Camlocs are installed
- trimmed camlocs, remeasured camloc distances, and match-drilled one half of them to fuselage
- match-drilled remaining camlocs, and removed, deburred, countersunk, and riveted them to upper fuselage; bent camlocs so upper cowl sits flush; started fitting of upper cowl to fuselage, including measuring and trimming of aft edge (lots of remove & reinstall steps)
- finished filing aft edge of top cowl (tight fit of 0.001-0.032”, per painter, so his crew can finish down to spec); match-drilled #30 holes into camloc drill guides using Mark A.’s “3 line” technique; upsized holes to 15/32”, sanded w/ dremel to just fit the grommets; attached temp o-ring retainers to grommets; riveted receptacles to flanges and temp. screwed all camlocs with the pins still engaged (i.e. “unlocked”) - all top cowl camlocs seem to work well!
- installed camloc flanges on the sides and lower part of fuselage
Installed fuel servo, and Aircraft Specialty Fuel lines with integrated fire sleeves:
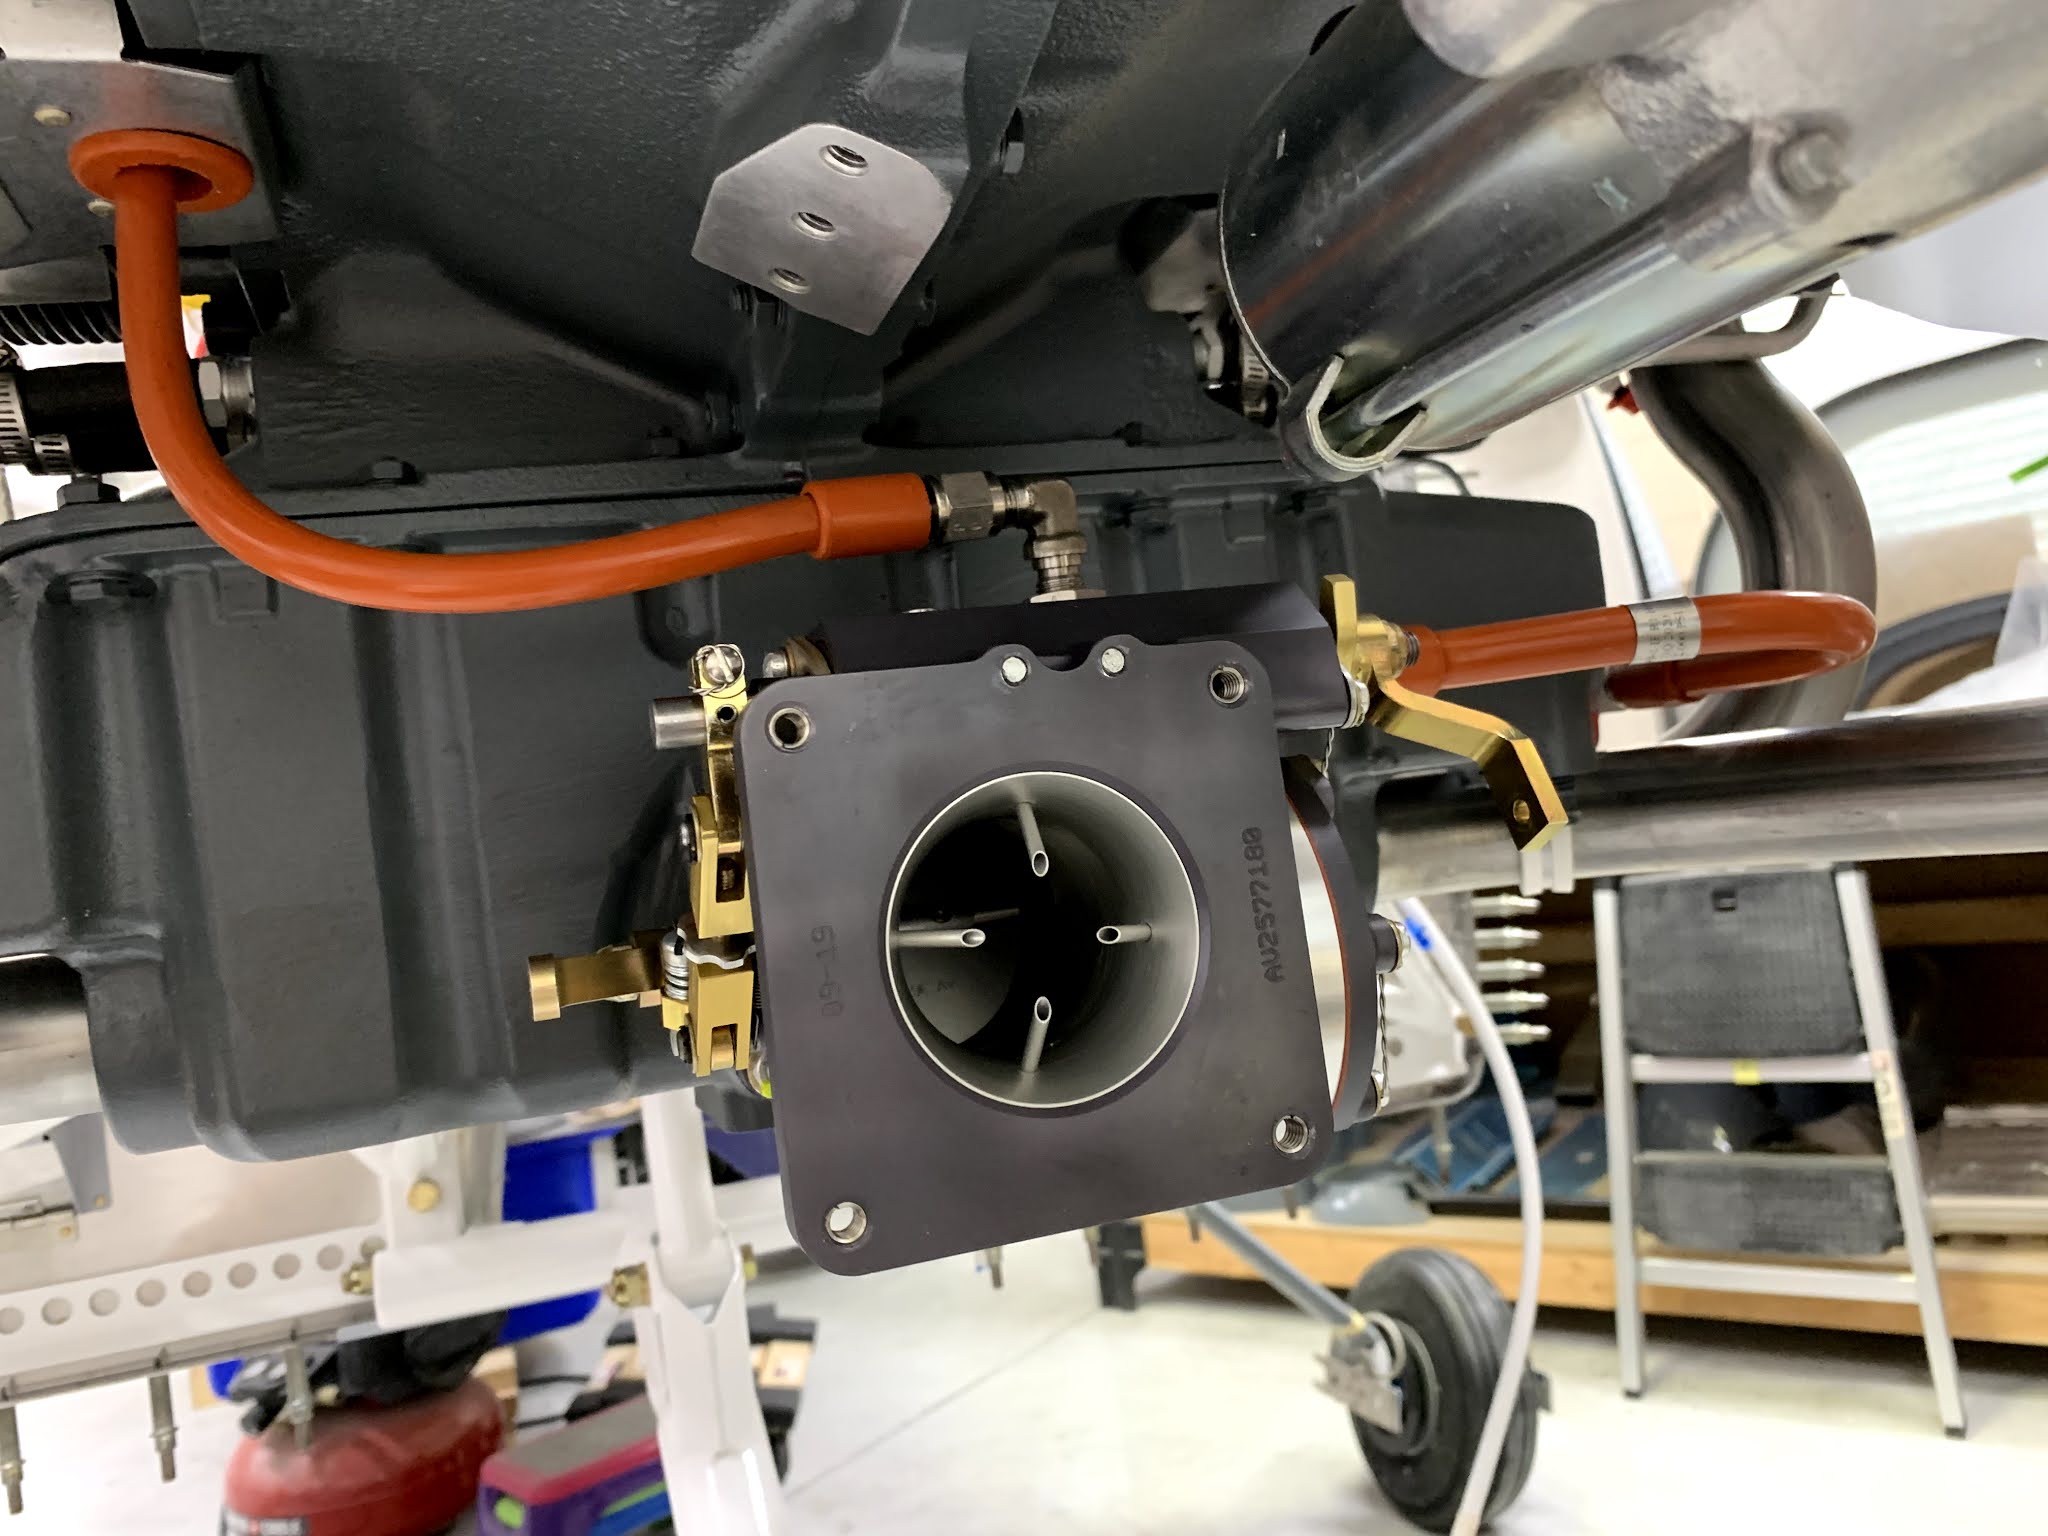
"red cube" fuel flow installed, with fuel lines attached:

Installing Adel clamps using a special tool - a bunch needed to be installed to the engine mount and the engine proper:

Installed power wires to starter:

Plane power primary (60A) alternator:

VA-102 from Aircraft Specialty is a little shorter than the stock Van's part, so make sure to clock the fitting on the fuel pump ~45deg from top center (Van's has you clock it 5deg left of top center):

Installed primary alternator and belt:

Closeup of alternator/belt:

Propeller!

Engine hoist came in very handy to install rear spinner bulkhead:

Also, I used hoist to help install prop to engine - a one man job, if planned well:

Prop installed:

Six 3/4" nuts/bolts torqued to spec using special crow foot:

Front spinner bulkhead, temporarily installed:

Another view of the prop:

Spinner temporarily fitted to check for clearance:
Parts as supplied by Skybolt to install their Camlocs, which I am using instead of Van's dastardly hinges:

Temporary positioning of the flanges for the top cowl:

Match-drilled and clecoed top flanges:

I used the "3 line" method (thanks Mark A.!) to locate the center of each hole - one insert is shown here, with three lines drawn on the fuselage that bisect its 1/8" hole:

A little out of order - riveted top flanges:

Example of how to extend the 3 lines onto the cowl - drill the intersection:

Completed top camlocs (out of order pic):

Back to the drilling - drill #30 holes at the 3 line intersection, then trace a circle around each cleco. Upsize the hole to 15/32" using a Unibit-1, then file so the grommets just fit. Secure using the temporary o-rings:

Positioned and drilled side and bottom Camlocs:

Riveted side and bottom camlocs (left side):

Example of camloc retainer, adjusted and locked into place:

Side and bottom flanges installed to the right side:

No comments:
Post a Comment