We finally finished Section 10 this weekend; and, I say "we" because my wife helped with a lot of the riveting for the last three large skins: Left Top Side Skin (last post); Right Top Side Skin (this post) and Top Skin (this post). The top skin required her to climb into the aft fuselage on stacks of towels, lay on her back, and buck about 60 rivets. I could manage the most forward and most aft rivets for the top skin by myself, but those center ones required a helper.
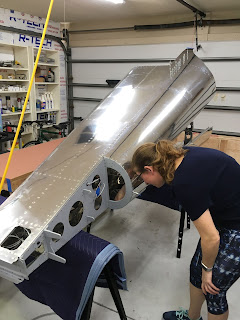
Here she is checking rivet shop heads on the right top side skin (fuselage was placed on the right side to ease bucking):
Monday, January 21, 2019
Sunday, January 13, 2019
Section 10 - Aft Fuselage (Top side skins - riveting Left side)
I visited a friend in the RV community last week to help him attach the forward fuselage to the aft fuselage of his RV-14A, and afterward he gave me a few pointers about riveting (thanks, Ken!). First, he recommended that I switch to the larger flush set with an articulating head and rubber sleeve. I purchased this rivet set about 6mo. ago from Cleaveland Tools, but have been reticent to use it since I didn't know how to use it properly. It takes at least ~20lbs of force to compress the rubber and thus have the set sit flush on the skin with no gaps - ah, that makes sense now. Second, he recommended that I switch to a 3x rivet gun (instead of a 2x) to get a more powerful strike. I have both guns, so no problem there. Third, he recommended increasing the air pressure a little, to not work-harden the rivets. There is a sweet spot for the air pressure - too low, and too many strikes equates to more scuffing and premature work hardening. On the other end of the spectrum, too high and there is a tendency to overstrike and thus overly compress the skin in areas that are thinner (e.g. skin-to-bulkhead zones, in which the bulkhead flanges are very thin and thus easily compressed). After playing around with the air pressure, the rivets we set today were some of the best driven rivets to-date ... and, the skin-scuffing around the rivets is at a minimum. I'll continue to play around with the pressure settings ... but, this was a big step in the right direction and I really appreciate the tips!
My wife had some free time today, and we were able to rivet the top left side skin to the aft fuselage assembly. Here, she is checking a rivet she just bucked:
My wife had some free time today, and we were able to rivet the top left side skin to the aft fuselage assembly. Here, she is checking a rivet she just bucked:
Sunday, January 6, 2019
Section 10 - Aft Fuselage (top skins - deburr, dimple, cleco)
After taking a couple weeks off from building (including a nice trip to see my mother in Virginia), I was back to work on the last few pages of Section 10. I'm still not in a rush, because my wing kit isn't due to be CRATED until the end of this month, and thus delivery won't happen until 4-6 weeks from today. I'm still kicking myself for not ordering the kit at least a month earlier. Back to the top skins: First step included deburring the edges and holes of the two top skins, then dimpling, and finally clecoing the left top skin, ready for my wife to help buck some rivets.
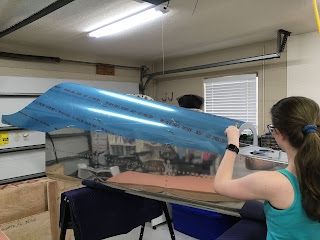
Checking the fit of the left top skin, prior to dimpling - enlisted my daughter to help raise and cleco the ~8' long skin
Checking the fit of the left top skin, prior to dimpling - enlisted my daughter to help raise and cleco the ~8' long skin
Subscribe to:
Posts (Atom)


