- installed idler arms; drilled, primed and assembled elevator pushrods and stick link pushrod
- riveted center section of forward top skin to fuselage structure (back-riveted as much as possible with my wife bucking); first time under the panel section - pain in the back; installed bushings into hinge ribs; primed and painted canopy cradles
- a half hour to torque ONE nut/bolt to attach control arm to fwd elevator pushrod; fabricated elevator bellcrank assembly; trimmed and installed AP pitch servo bracket; installed bellcrank mount; installed mid elevator pushrod to bellcrank assembly; installed elevator pushrods to idler arms; checked match-drilling of Tosten control stick with stick bases
- Installed pitch servo
- greased and installed canopy cradle assemblies (4 difficult-to-reach bolts); attached gas springs to canopy cradle assemblies; installed canopy release mechanism and tested action (very nice); prosealed rest of top forward skin to fuselage; also, prosealed gaps in the firewall and subpanel, but instead of sealing from the inside, after placing a fay seal on the flanges and clecoing the skin, I sealed the remaining holes from the outside, pushing the sealant through the holes. Next proseal session, I may fillet seal from the inside as well (belt-and-suspenders, incase there is a small gap I couldn’t see)
- Final-drilled both Tosten control sticks; attached control stick bases; attached link stick pushrod; worked on control column travel to get both sides to hit stops at the same time; aligned control sticks
continued working on control column travel to get both sides to hit stops at the same time
riveted rest of top forward skin to fuselage; added final bead of sealant to subpanel and plugged any other holes with sealant, taking care to not make it too thick (may impede canopy)
- attached brace brackets to brace; riveted fwd and aft roll bar frame assemblies; clecoed roll bar frame assemblies, roll bar straps and window shims; #30 final-drilled outboard #40 holes
- #30 final-drilled inboard #40 holes; deburred holes; machine countersunk outbd roll bar strap where bar brace attaches; countersunk #30 holes in window shims; primed the inside of the frame assembly
Elevator pushrods (3) and stick link pushrod:

Riveted center section of forward top skin:

deburred and primed and painted canopy cradles:

Nifty tool to hold bolts, washers, and nuts - here, this bolt and washer will attach the control arm to the forward elevator pushrod:

One nut, 30min, and finally this damn thing is tightened and torqued:

Assembled elevator bellcrank assembly:

Attached bellcrank assembly to mid elevator pushrod:

Prewired Tosten grips and sticks - some of the best money I've spent. I just had to final-drill #12 to the control stick bases:

Attached bellcrank assembly, mid elevator pushrod, and pitch servo:

Attached forward and mid elevator pushrods to idler arm:

Installed right canopy cradle assembly (bolts were a bitch to torque):

Left side wasn't any easier:

Installed canopy release mechanism - shown here in full release mode:

Release pins in release (out) mode:

Release pin in attach mode:

Prosealed the rest of the top forward skin:

Other side:

Installed sticks/grips:
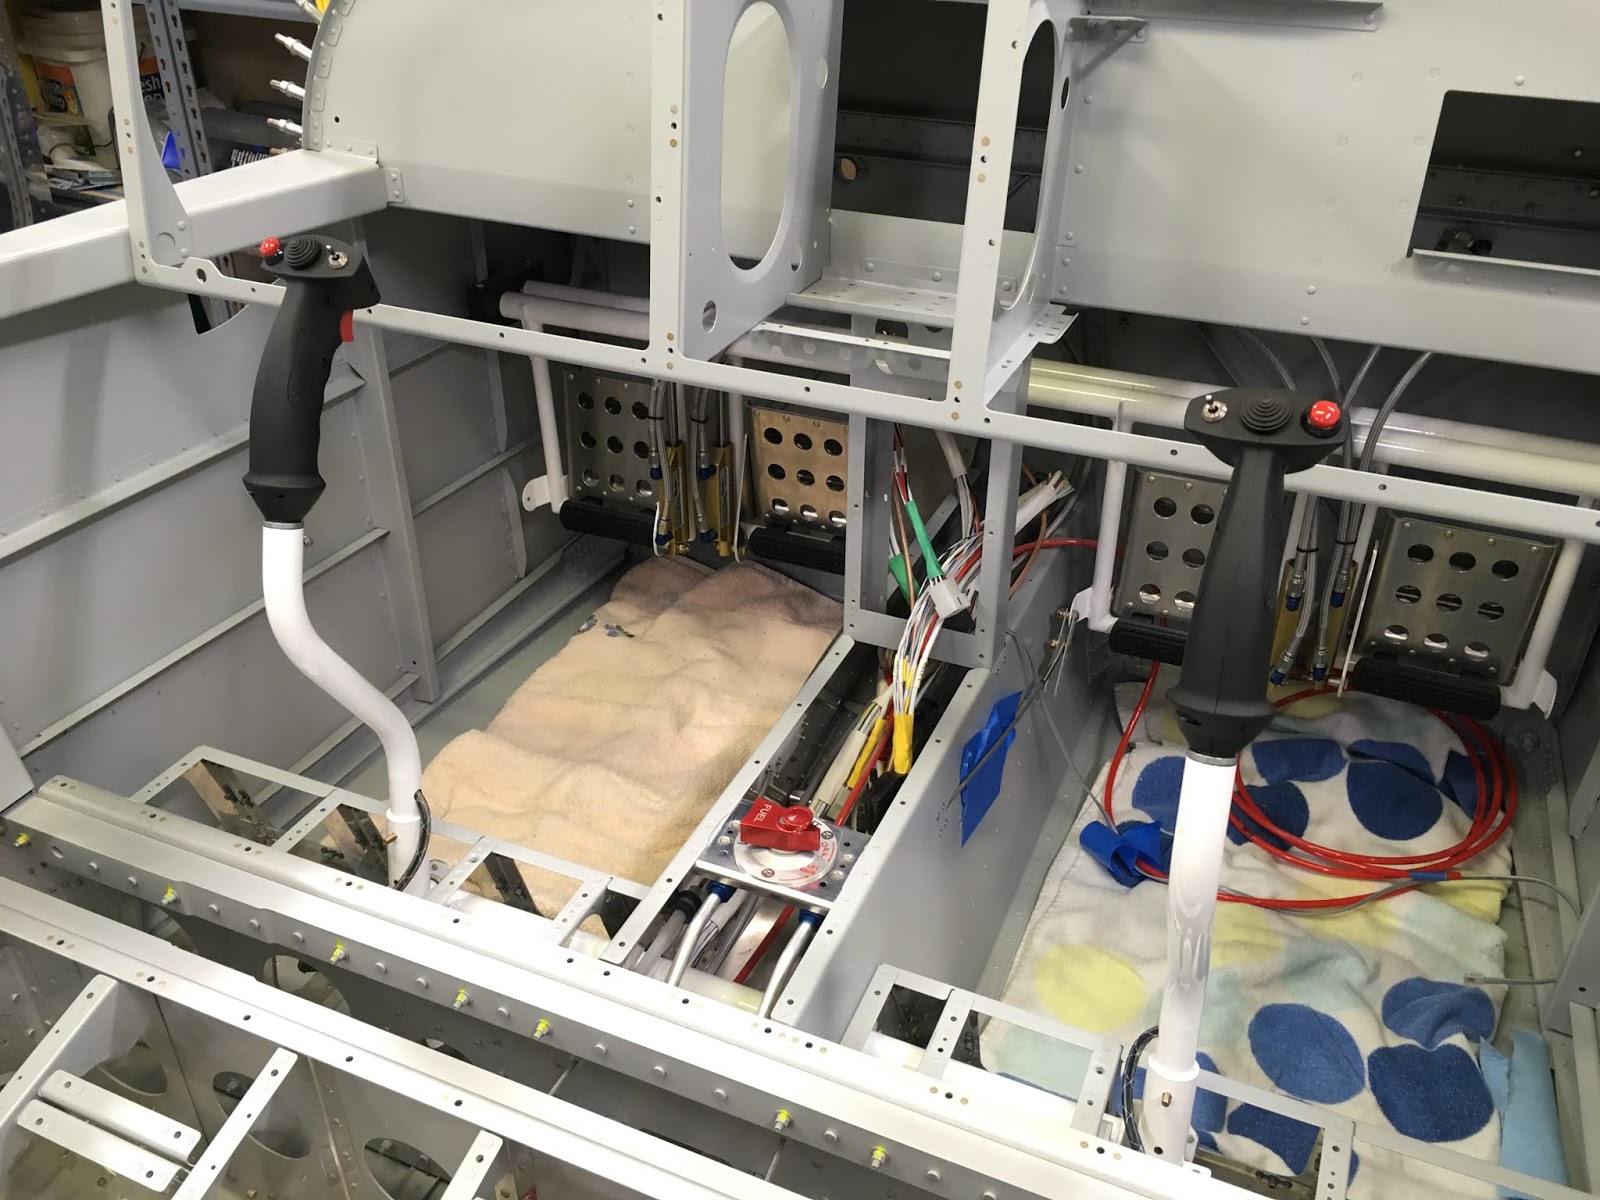
Showing a little stick travel:

Attached stick link pushrod (yes, I already put torque seal on the jam nut):

Filing bearing brackets to make sure both sides touch at the same time and have the correct travel:

Final riveting of the forward top skin (that is, until I attach the Camlocs to the firewall flanges):

After watching a Vic Syracuse inspection of Ken B's nice RV-14A, I realized I had to redo my safety wire - first, it needs to be 0.041" wire. Second, It has to be twisted between the bolt and the arm, and not just looped around. Here is the final, correct version:

Final proseal of the top skin - the layer shown here is very thin, so as not to obstruct the canopy's movement:

Temp fitting of the forward roll bar frame assembly, to partially rivet it in place (same was done for the aft roll bar frame assembly, not shown)

Aft roll bar frame assembly, fully riveted together:

Forward and aft roll bar frame assemblies, roll bar straps and window shims #40 clecoed:

All #40 holes were final-drilled to #30:

Inside of the roll bar assemblies were primed (the outside will be primed and painted later):

No comments:
Post a Comment