- attached aileron trim springs to pushrod, using inboard skin as a guide - it was somewhat difficult to get perfect "neutral" position of pushrod
- deburred edges of inboard bottom skin; deburred, dimpled and riveted flap gap and aileron gap fairings; tried to attach pins on micro-molex (got 3 good ones, 2 crappy ones that have to be redone - ordered more micro-molex pins and redo)
- deburred edges and holes of outboard and inboard bottom skins; final-drilled #19 holes; filed down and primed forward overlap of inboard/outboard skins
- attached springs to servo trim arm; attached 3 of 5 wires (with micro-molex pins) to micro-molex connector body
- riveted inboard bottom skin to wing assembly and riveted all nutplates onto inboard bottom skin; also had visitor (Terrell Y.; also constructing an RV-14A) and showed him how I rivet bottom skins
- riveted 90% of the outboard bottom skin - what a pain in the ass
- finished riveting everything on the bottom skins (including access nutplates), except for 29 rivets near skin junction (need wife to help with these); drilled, deburred and dimpled access plates
- deburred holes (4 skins) and edges (2 of 4 skins) of aileron skins for both wings
- finished deburring last 2 aileron skins; dimpled everything for the left aileron and also for parts of the right aileron (prematurely for trailing edge of skins, but this should still work - might be better; UPDATE - the ailerons are very straight, so I might choose this tactic for the right aileron); clecoed together left aileron assembly; reamed trailing edge @ ~8 deg angle (performed outside trailing edge since I already dimpled the trailing edge portion of the skins); disassembled left aileron
- riveted nose skin to nose ribs, top skin and bottom skin to spar, counterweight to skin, and side ribs to each other
Flap and aileron gap fairings clecoed to right wing assembly:

Springs attached to torque tube-to-bellcrank pushrod:

Springs attached to trim servo arm - VERY difficult to get the second spring on the arm (glad I did this before riveting bottom skins).

Looking through the lightening holes reveals that trim servo arm and springs clear the pushrod (i.e., no rubbing). Hint: the servo arm comes punched with a slight bend due to the fabrication process. Orient it with the concave side facing aft.

3 of 5 micro-molex pins placed in molex connector; the instructions don't tell you what holes to use; just match the colors with the molex connector that's part of the wiring harness. Gray/white wires are power and can be installed to either white wire (servo direction supposedly can be reversed in the G3X software once installed):

The instructions actually mention to deburr the bottom skins, so I did:

Filed down the forward overlap between inboard and outboard bottom skins, and primed:

Riveted aileron gap and flap gap fairings:

Finished riveting the inboard bottom skin (right):

Riveted nutplates to inboard-most access hole:

Riveted nutplates to inboard edge:

Dimpled outboard bottom skin (right)

Started riveting outboard bottom skin (right):

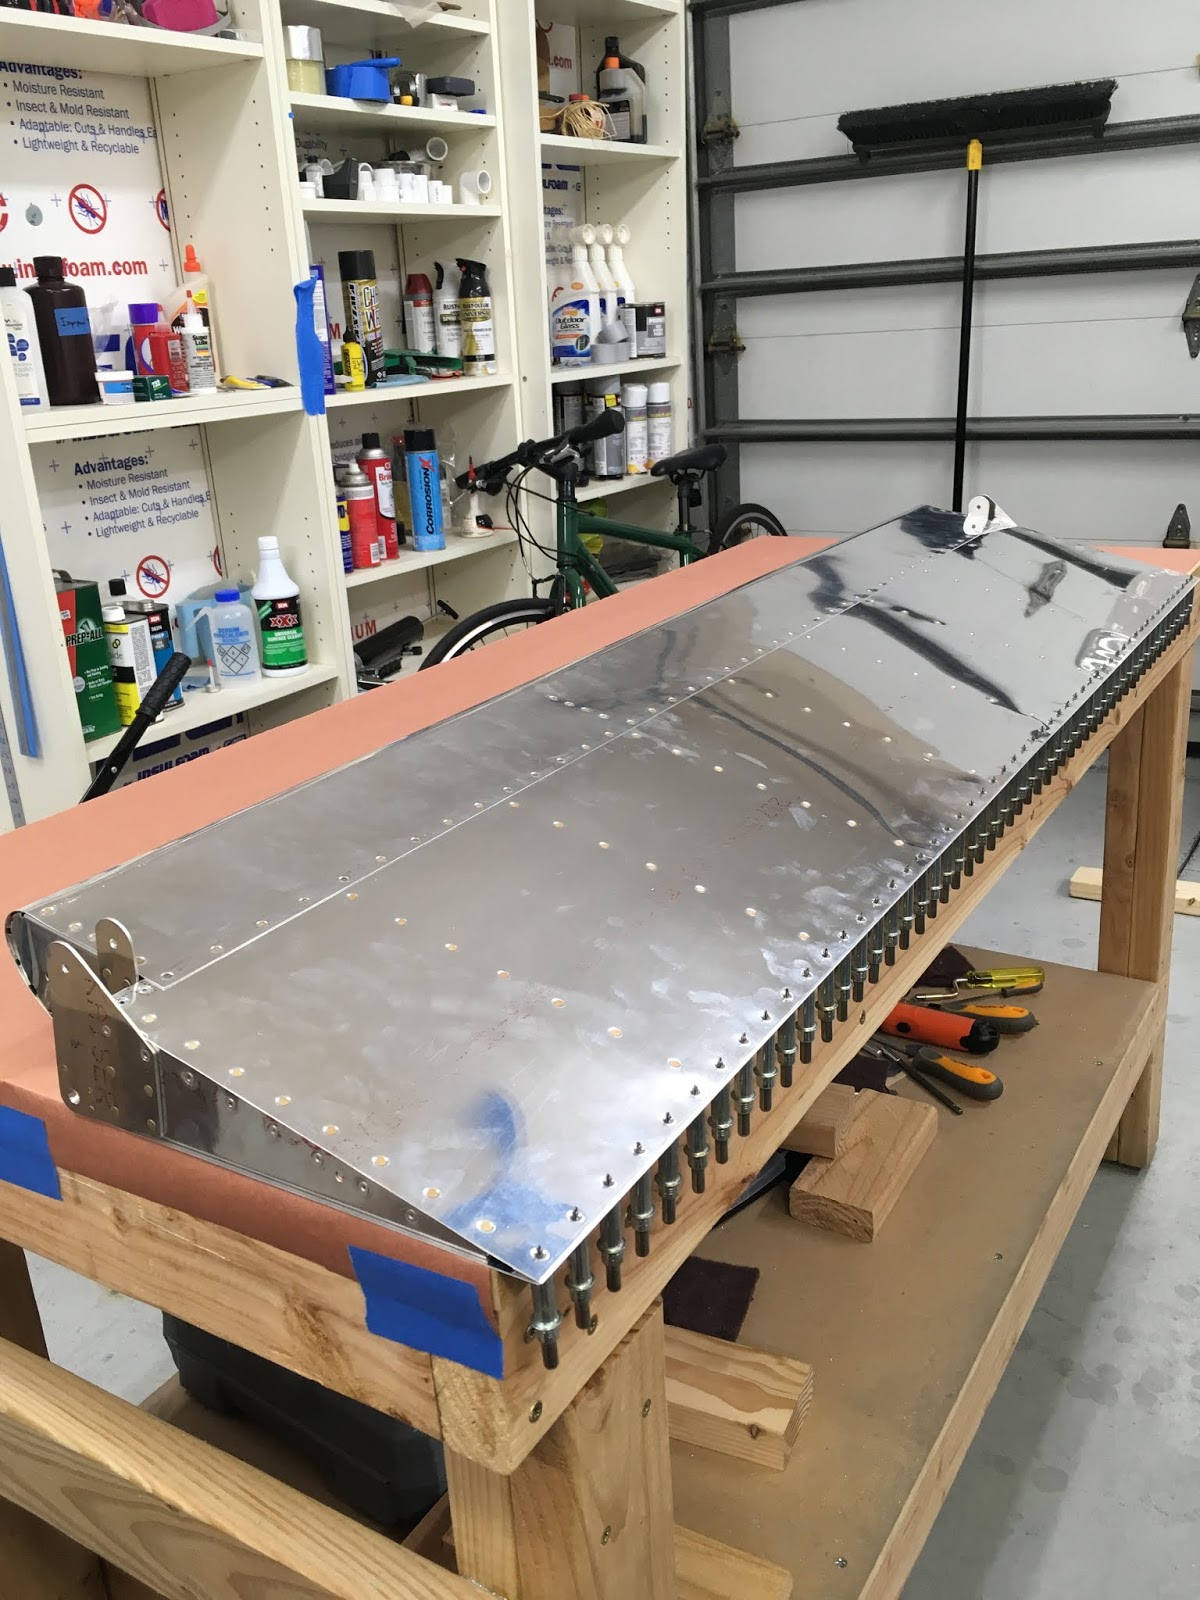
Almost finished riveting outboard bottom skin (right):

The last 29 rivets that need my wife's riveting skills while I buck the shop heads:

Extra micro-molex pins were received, crimped properly (and this time with the correct crimper), and installed into the molex connector:

Left aileron, with stiffeners and end ribs back-riveted (I think this one is the top skin, but I did both the top and bottom):

Dimpled nose skin for left aileron:

Clecoed left aileron, and realized that I can't final-drill the trailing edge wedge since the trailing edge portion of the skins were dimpled by accident. Oh well, I removed trailing edge, reamed the holes at the same correct (~8deg) angle, and countersunk the holes.

Riveted nose ribs to the nose skin - tape used to prevent warping of skin:

Riveted top and bottom skins to spar, riveted ribs to each other, and the thing lies flat; the only steps remaining for the left aileron will be to tape and then rivet the trailing edge wedge.
2 comments:
Moving right along.
Have you been for a ride/flown the 14?
H
Thanks, Henry! I took a demo ride in the -14A at the factory in 2017, and it was quite different than my slow and unresponsive Cessna 182S. I'm looking forward to the first flight on my own -14A ... likely in 2-3 years.
Post a Comment