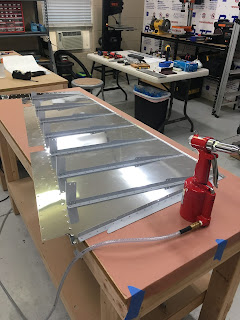
Back-riveted stiffeners to rudder skins and and blind-riveted stiffener clips to right rudder stiffeners:
countersunk trailing wedge using a special RV-14 jig from Cleaveland Tools:
Blind-riveted left stiffeners to right stiffeners and clips - pain in the ass, and really can't be done without someone holding the upper skin:
Trailing edge done - it's straight, too! Not shown is the painstaking process of putting double-sided tape on the wedge (both sides), then making sure the wedge sits exactly in their corresponding dimples (if not, the tape is EXTREMELY sticky and hard to move the part once adhered), and then double-flush riveting while trying to keep the edge straight. Thanks to the EAA SportAir Workshop, I had already done a practice version of the trailing edge, which really helped.
The rest of the pictures are from the next day of work. First, I riveted the skin to the counterbalance rib. There's a lead weight in the top leading edge of the rudder:
counterbalance shim to hold the lead weight:
I guess I finished a couple tasks here, including riveting the skins to the main spar. I finally figured out how to use the pneumatic squeezer to get nice, consistent rivets - I only had to drill-out and re-rivet two.
The absolute worst part of this build is the leading edge. It took about 2.5 hrs to coax the skins that form the leading edge into the proper form (there's a template for that, too), after which I could blind rivet them. Extreme care must be taken to not bend a crease in the leading edge; rather it has to be a gradual bend, which took a ton of patience to get right. First, duct-tape a pipe of some sort (3/4" PVC worked fine for me). Then use a vise-grip to slowly bend the edges toward the center line. Once you get the rough shape, the pipe is removed and the final shape is kneaded by hand - a tortuous process.
For the FAA (below) - yes, I was the one doing the bending. And thanks again to the EAA SportAir Workshop - the instructor had us bend the leading edge using the same technique. That course was so worth the money.
Finished rudder - look at that sweet trailing edge:
The finished leading edge is below; the light at the end of the tunnel was that I got to use my favorite tool (pneumatic blind rivet gun) to set about two dozen rivets in the leading edge.
Closeup of bottom part of the leading edge:
Another view - I was so happy I finished that I took too many pics.
NEXT PROJECT ... Horizontal Stabilizer!


No comments:
Post a Comment