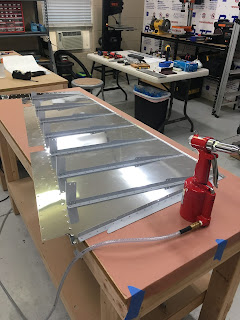
Lots of progress the last couple of days - these myriad parts are starting to look like a horizontal stabilizer ... well, the skeleton anyway. Much of the work has been deburring edges and holes ... a thankless but necessary task that took a half dozen hours. Not shown, dimpling the ribs and skins, a task I very much enjoy (using the DRDT-2 is therapeutic). Below are a few pics from this midpoint stage in assembling the H.S.
Countersinking a couple hundred holes on each side of the front and rear spars, and stringers (rear spare shown here). Aluminum shavings/filings everywhere!
Tuesday, August 28, 2018
Wednesday, August 22, 2018
Section 8 - Horizontal Stabilizer (initial work, front and rear spars)
Starting with the Horizontal Stabilizer, I am priming ONLY non-alclad parts, since the pure aluminum coating on the alclad parts acts to prevent corrosion. I estimate that this will save about 10lbs in weight overall, as compared with priming all non-skin internal parts, which was my original modus operandi.
Rear spar with 4 of 5 brackets clecoed (this is the only pic I currently have of the rear-spar - it is currently riveted and sitting awaiting assembly with the ribs, stringers, etc.):
Rear spar with 4 of 5 brackets clecoed (this is the only pic I currently have of the rear-spar - it is currently riveted and sitting awaiting assembly with the ribs, stringers, etc.):
Sunday, August 12, 2018
Section 7 - Rudder (riveting everything together)
Lots accomplished today, much of which was riveting. This post will be mostly pictures, with only a few words, since I'm pooped from almost 8 hrs in the workshop. All the parts preparation the last week or so made today just knocking out the riveting tasks one-by-one.
Back-riveted stiffeners to rudder skins and and blind-riveted stiffener clips to right rudder stiffeners:
Back-riveted stiffeners to rudder skins and and blind-riveted stiffener clips to right rudder stiffeners:
Friday, August 10, 2018
Section 7 - Rudder (new bench/shelf; trailing edge; priming)
I needed a little more storage for the large flat and odd-shaped pieces in the empennage kit (the floor wasn't working), so a fellow builder (Ken B.) recommended 2x4basics (Amazon) to create a 4'x8' bench/shelf. He uses this setup for the wings (large) in lieu of the EAA workbenches. I'm using it for storage, at least for now - thanks for the suggestion, Ken.
Saturday, August 4, 2018
Section 7 - Rudder (trimming; initial assembly; drilling trailing wedge)
The rudder is making the vertical stabilizer seem like child's play. Lots of little parts that all need to be separated and trimmed down to their final shapes. Skins are VERY thin (0.016") and feel like they will bend/break when I move them around. Tons of rivets in the skin as well as lots of LP4-3 (and other) blind rivets to zip the entire assembly together. Amazing engineering though; I like the lead weight used as a counter balance. For those of you, whom have flown an RV, that smooth feel of the control surfaces is due in large part to well-matched counterweights.
Subscribe to:
Comments (Atom)


