Recently, I passed a milestone: 1500 hours working on this project over the last 2 years and 1 month ... and it still excites me every time I go into the workshop! This was a big couple of weeks - first, I finished the camloc installation, which was a pain in the ass, but they look great and hold the cowling very well. Second, and perhaps most important, I started installing the avionics panel! Lots and lots of wires and gizmos behind the panel, but the panel itself is a beaut and I am glad I went with the larger GTN750xi instead of the smaller GTN or the even smaller GNX/GNC boxes. Real estate matters, esp. flying IFR. Specifics are as follows:
- installed camloc flanges on the sides and lower part of fuselage
- epoxied the inside of both cowlings (did this early in the camloc install process, so I don’t have to uninstall all of the camloc grommets later)
- added two more camloc flanges to upper cowl (the ones that are aligned with the side flanges of the lower cowl)
- added two camlocs to upper cowl; positioned and trimmed aft edge of lower cowl (needed 1/8” or so trimming for most of it); had to grind off some of the corners to make the cowl fit well (and bend the camloc flanges back a bit in the lower corners); wife helped hold aft section of lower cowl
- installed side camlocs on lower cowl; drilled holes for bottom camlocs on lower cowl; trimmed lower aft edge of lower cowl; installed two wires (one to alternator and one to starter)
- installed camloc retainers on bottom of aft lower flanges (4 per side); cut upper flange of lower cowl and sanded to trim line (near-final; only needs a few touch-ups)
- spacing and drilling flanges for the horizontal sections of the lower cowl; countersunk all holes in lower cowl for flange rivets; countersunk flanges to accept retainers
- riveted flanges to lower cowl; drilled holes and installed grommets in upper cowl; fabricated screw mechanism for grommets that are close to engine mount bolts; installed retainers in lower cowl; essentially completed rest of Camloc install (except for locking the remaining retainers); drilled #19 holes in forward part of cowls
- Delivery, uncrating and partial unpacking of SteinAir panel!
- finished unpacking panel
- trimmed, clecoed and floxed inlet ramps onto upper cowl; installed upper cowl on fuselage; prepped oil door and drilled holes (1/4”) to install camlocs
- installed panel onto panel frame on fuselage (with wife and daughter); enlarged hole for canopy release; drilled and deburred 6 holes for Nav’s mounting bracket; placed all wires in respective areas; installed circuit breaker panel (needed to modify support by bending forward flanges aft 90deg); drained water in air compressor
- Installed Nav and audio panel; planned placement of other boxes behind panel
- installed transponder on shelf on right side (shelf had to be altered to fit, and 4 brackets were constructed from 0.025” aluminum, bent into angles); started remote comm install; checked placement of vent cables and how they impinge on avionics shelves; retied right cable bundle
Installed left side flanges (Camlocs):


Pic from SteinAir showing the circuit breaker panel:


Right lower bottom side, completed:


Side flanges cleco-clamped in place with a rivet fan, which enables even and accurate spacing of holes - here, I've drilled 3 holes so far on the left:


Every other camloc pilot #30 hole drilled on the right:
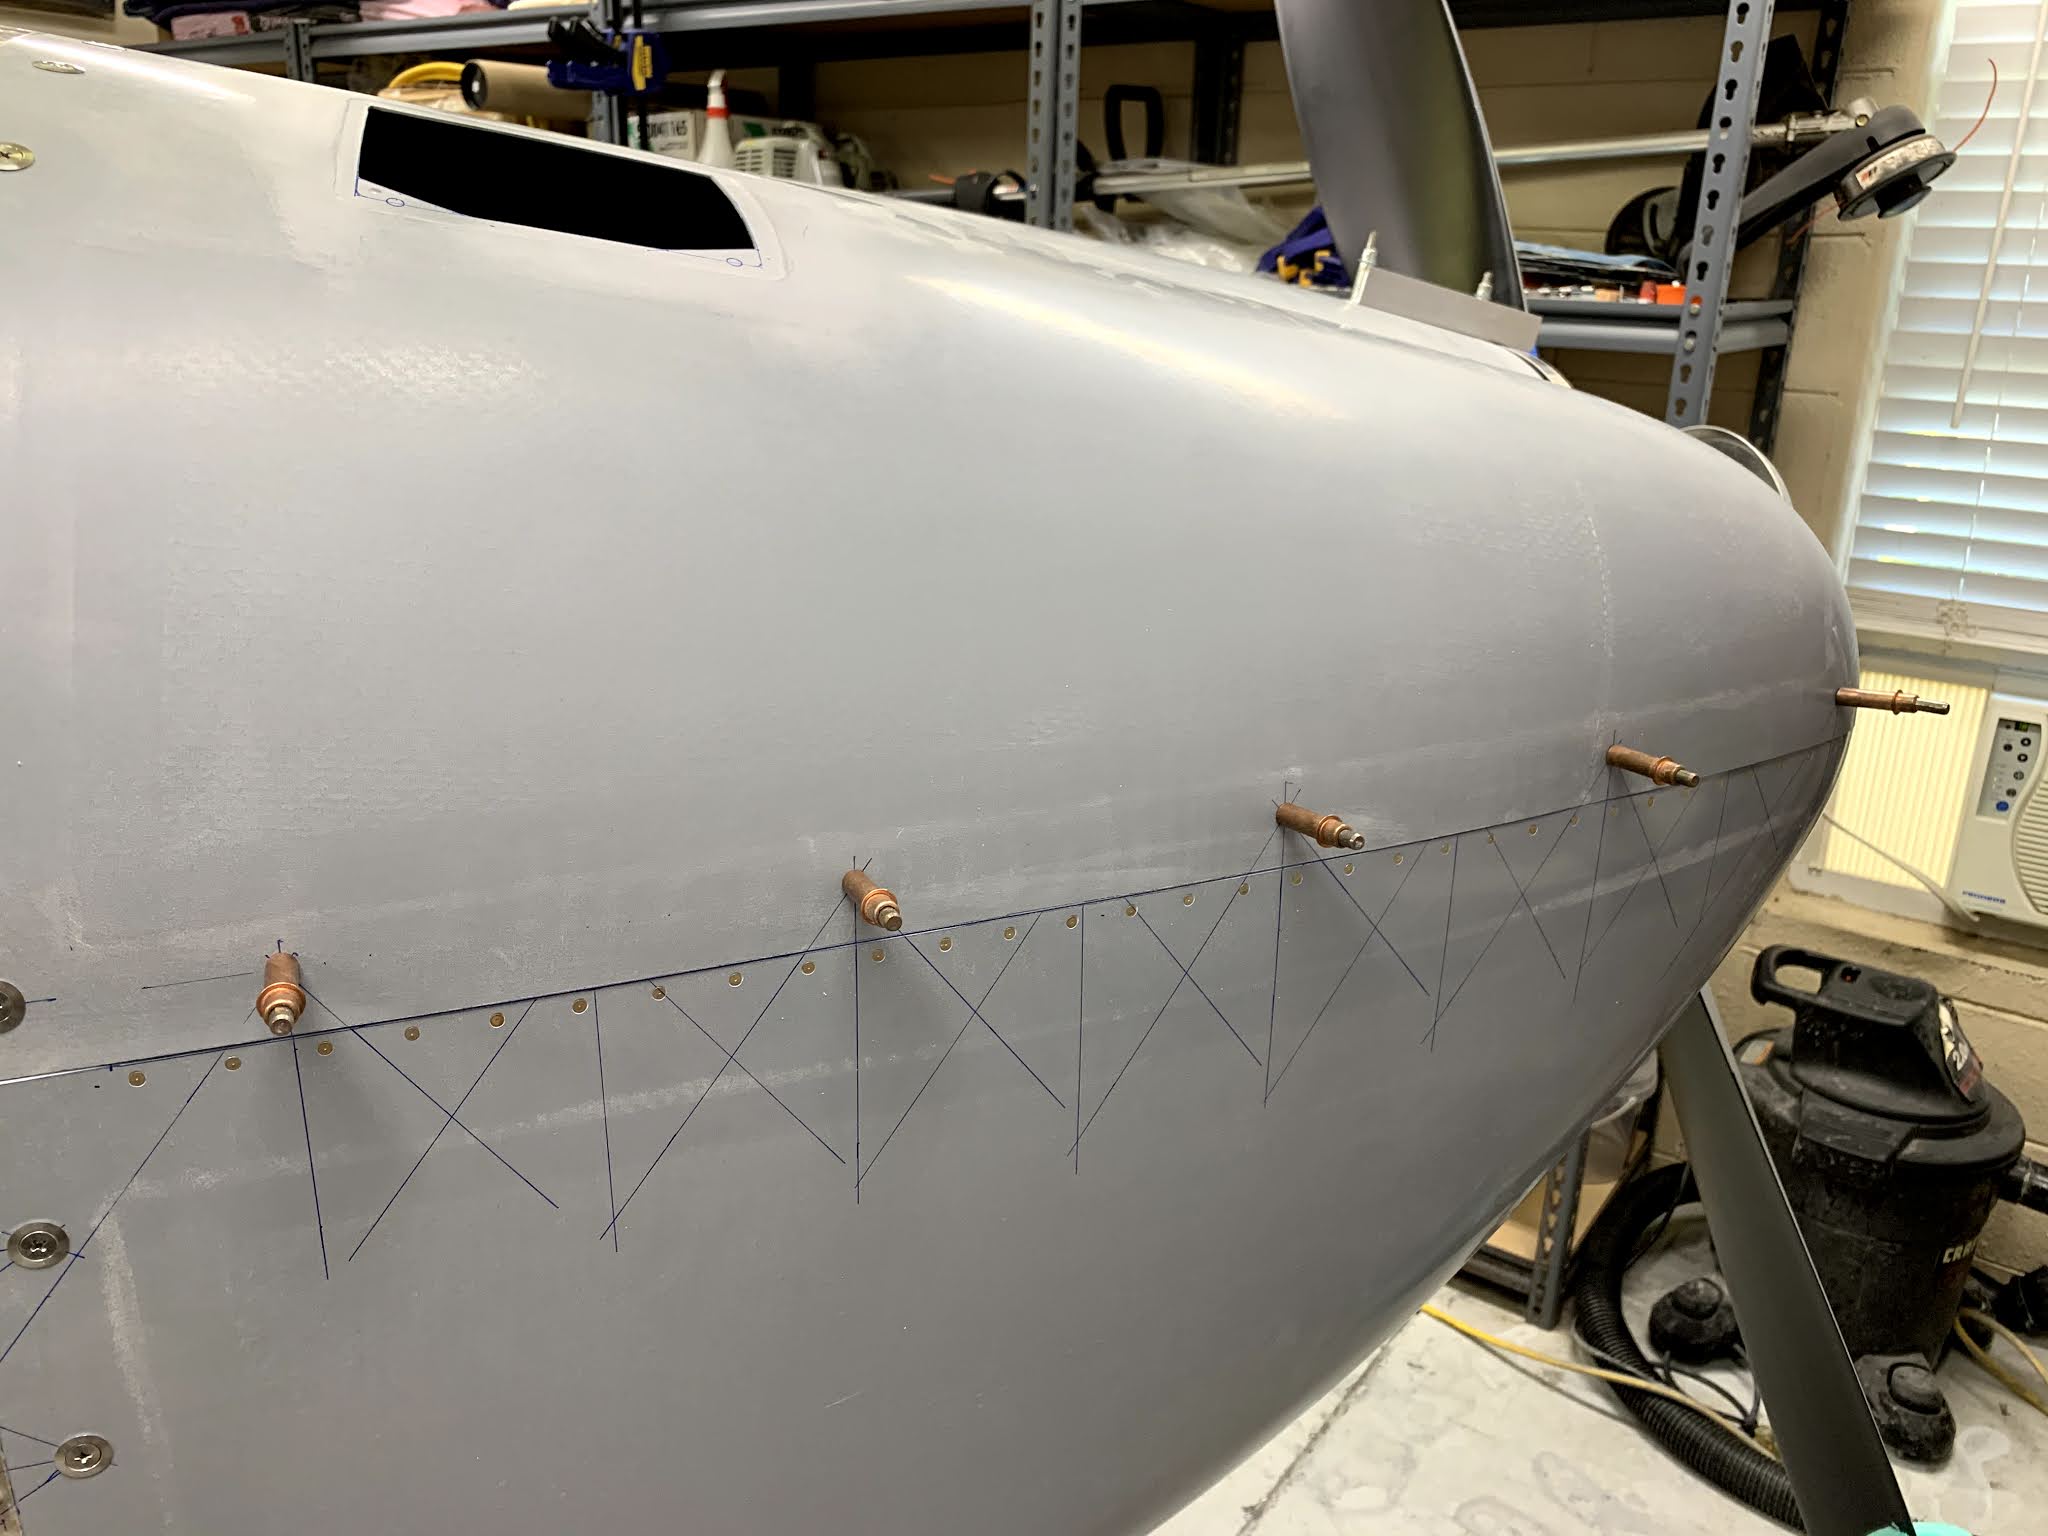


Right side, completed - note that I have to file a little of the bottom edge of the top cowl to prevent any overlap. NOTE, that the painter wants all the gaps as tight as possible - they will do the final touches. So, the max gap is at the front right outboard part of the nose, and it is still <0.032"! Not bad, not bad.


Back to the panel - it arrived a few days ago, and this is the tangle of wires that I had to contend with.


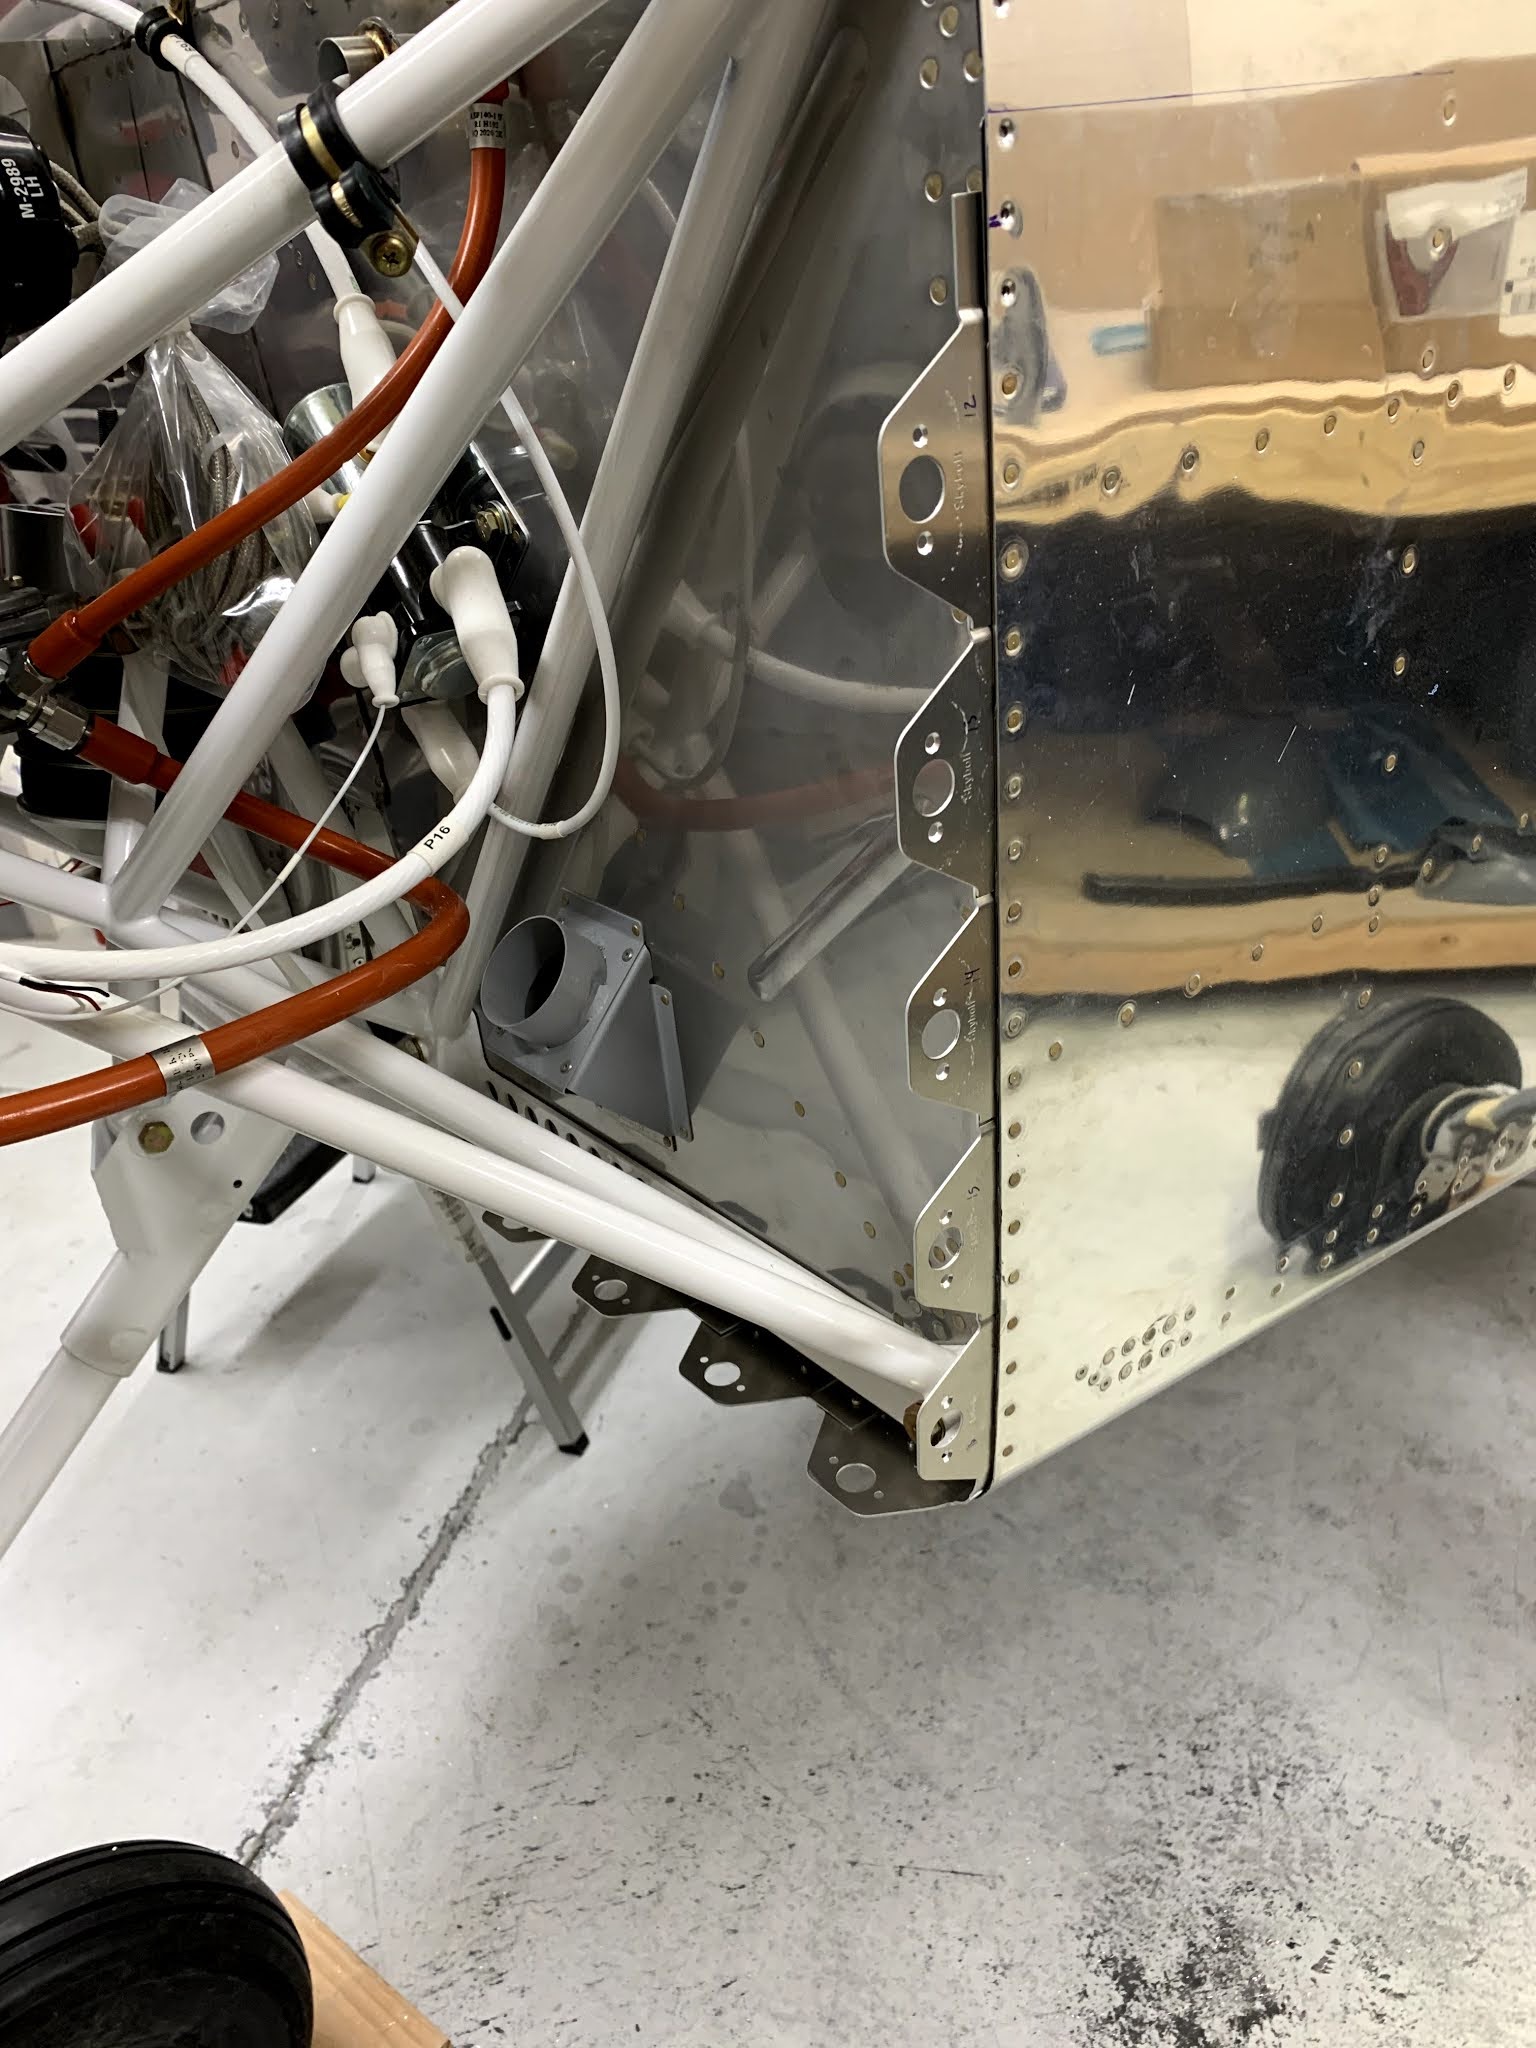
Now, it's time to install all those remote boxes that enable such a clean-looking front panel. Here is an avionics shelf that I made a while back (when I had more access); however, I started adding flanges that will support the ADS-B transponder:


No comments:
Post a Comment