My wife said "there's a lot of 'wifey effort' that hasn't been documented yet on your blog" ... so I figured I better post something today. She's in the pics below, helping me do "The Big Join" (term coined by Ken B.) of the aft fuselage and the mid/fwd fuselage parts. With a lot of planning, and a nicely crafted fuselage cradle (see last 2 posts), AND most importantly having assisted Ken B. with his 14A's Big Join in January, the process was fairly straightforward. Riveting the two parts, however, has been a bit of a pain in the ass. All but the last 37 rivets have been set. Here are some of the tasks completed during the past ~10 days:
- Drilled, deburred, and riveted gussets to longeron and seat back brace; riveted intercostals to skin, longeron, and seat back brace; bolted roll bar bases to fuselage
- Prepared left and right vent assemblies (will install after section 35)
- deburred and dimpled F-1406 bulkheads; riveted nutplates to bulkheads; test-fit bulkheads to aft fuselage; reorganized workspace to position aft and forward fuselage sections for “the big join”; with my wife, joined the two fuselage halves using clecos.
- clecoed the left, right and top F-01406 bulkheads to skins and ribs and stiffeners; installed ELT antenna bracket; separated, deburred, primed, and riveted shoulder lugs and lug clips; riveted lugs to bulkheads
- riveted left, right, center top bulkheads to each other and to the skins; riveted lugs to skins (my wife helped with back-riveting in several sections)
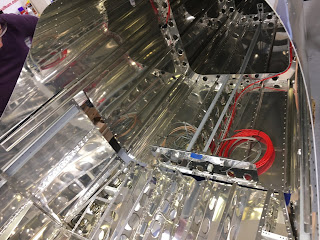
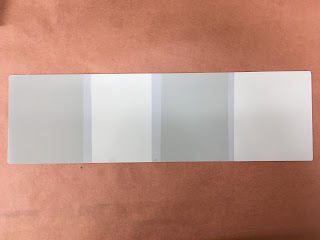
- riveted the two halves of the fuselage together (various areas) with my wife using the back-rivet bucking bar; riveted 12 of the remaining 23 rivets in the fwd bottom skin; tested two colors of gray for the interior paint - will go with the Light Gunmetal 50 Gloss from Cardinal (A-GR10-4A05)
- riveted remaning 11 rivets in the fwd bottom skin; riveted all but 37 rivets between the aft and fwd parts of the fuselage (almost completed the Big Join) - my wife helped on these PITA rivets
Clecoed seat back brace to fuselage assembly:
DON'T FORGET TO CLICK "READ MORE" TO SEE THE OTHER UMPTEEN PICS FOR EACH POST (this message is mostly for my 80 year old mother)
Riveted brace and bolted roll bar bases to assembly:
Completed:
Test-fit part of vent assembly to left side, using neodymium magnets - these suckers are STRONG, so should hold it in place when I eventually silicone adhere it to the skin (bought 40 magnets - 20 per side - which should be ample):
As far as I can get with the vents for now - the rest will be done after Section 35, to make sure the panel brackets don't interfere with the vents:
Test-fit the bulkheads to the aft-fuselage:
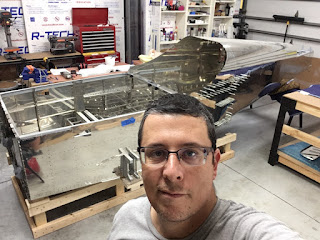
Beginning the big join by positioning the aft and mid/fwd fuselage halves within inches of the final location. Notice the smiles - this is a major milestone!
Another view:
View showing the initial position and space between the two halves:
Inside view, before clecoing the halves together:
After clecoing the halves together (but before installation of bulkheads):
Another view:
My mug in the frame, for the FAA - yes, we did all of this ourselves!
Clecoed the three bulkheads (left, right, top center):
Starting to rivet the bulkheads together and to the shoulder harness lugs:
Riveted a lot of the top center, left and right bulkheads to the skins:
View from the top, showing rivets that connect the top and left bulkheads:
We decided on an color for the interior:
That light gunmetal color is the 1st and 3rd sample shown here (the 2nd and 4th are a much lighter gray; the thin lines are the SEM primer alone). I tested before (right) and after (left) scuffing the aluminum with scotchbright - definitely needs the scuff so the primer/paint adheres best:
Aaaaalmost finished joining the two fuselage halves:


No comments:
Post a Comment