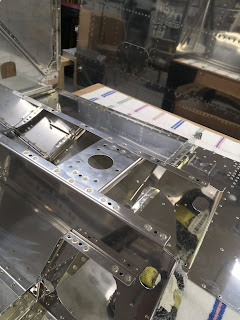
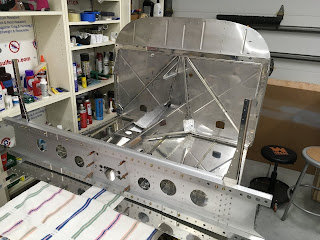
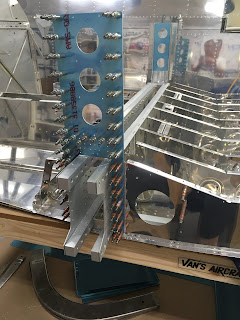
- countersunk, primed and riveted tunnel angle (F14132); joined muffler and firewall assemblies; riveted tunnel sides and cover bases to forward bottom skins; riveted and bolted center section bulkhead to firewall/muffler assembly
- back-riveted cover ribs to forward bottom skins (with my wife); riveted cover base webs to cover ribs; prepared firewall penetration fittings (waiting for another section of proseal, so won’t waste tube); cut and polished stainless steel vent hinges
- drilled and dimpled hinges for vents; deburred and primed vents, sides and arms; riveted vent door assemblies and inlet assemblies and cable brackets to firewall; countersunk and riveted battery box to firewall
- installed cover panels and nutplates on cover panels; broke down the fuselage crate for trash (still need to proseal and attach the firewall penetration fittings)
- prepped and primed the skin overlaps between center bottom and forward bottom skins
- joined front and middle fuselage halves; removed bulkhead bar assemblies; primed lower gear braces; attached brass elbows to gear braces (for brake fluid); attached gear braces, lower and upper drag fittings with bolts; clecoed center section side plates; final-torqued bolts in upper and lower drag fittings
- match-drilled #40 holes in upper drag fitting; removed and deburred center section side plates; re-clecoed side plates
- fabricated wooden stand to put fuselage on its side; prepared workshop for fuselage move to floor
- moved fuselage to floor (standing on side); clecoed every hole; riveted all holes (except for muffler shroud) with my wife helping with all parts that were back-riveted; prosealed muffler shroud and firewall penetration fittings; attached two nutplates
Here are the main wiring harnesses from SteinAir (doesn't look like much for $1300 ... but this would have taken me forever to make, and I'd probably screw up multiple times);
Riveted fuel selector valve holder:
Riveted some bracket (routing channel?):
Joined firewall and muffler assemblies:
Primed, countersunk and and riveted tunnel angle to firewall assembly:
Attached forward center section bulkhead:
Started bolting and riveting bulkhead to front firewall section:
Primed parts for heater vents:
Riveted arms for heater vents onto vent flaps:
Vents assembled:
Vents installed on firewall:
I agonized over the battery box, since I want to install an EarthX battery (likely the 900-series). I purchased the BB-MU, but the hole pattern didn't fit. The nice folks at EarthX took my return, and said the standard box would fit their batteries, which was also confirmed by at least one VAF forum member. I will say that the mounting of the box to the firewall is severely over-engineered, esp. if one is installing a light EarthX battery:
Installed cover panels:
Primed skins where the forward and center sections will mate:
Other skin:
Another view:
Mated the sections, bolted the upper and lower drag fittings and and gear braces, attached the center section side plates, and match-drilled the upper drag fitting:
This thing is starting to look like a fuselage! And, it's huge:
Reinstalled center side plates after deburring:
Fabricated support leg, and (with the help of the entire family) got the beast off the table and on its side. It's not too heavy, just bulky and awkward to maneuver:
Another view of the beast on its side, propped up with various cushions that really don't belong in a dirty workshop:
Fully clecoed and ready to rivet:
Closeup view of the sections to be mated:
CherryMax rivets installed through the lower drag fittings:
Prosealed the firewall penetration fittings:
All done, except for 7 rivets (prosealed the aft muffler shroud area, which has to cure over the next 3 days):
Goodies from Steve at Aircraft Specialty, including fuel lines (top 4) and brake lines and fittings - beautiful and a SUBSTANTIAL upgrade over the kit-supplied el cheapos:


No comments:
Post a Comment