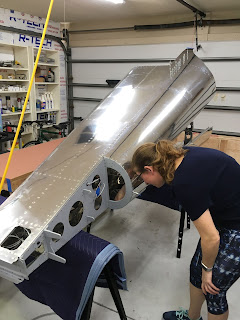
Here she is checking rivet shop heads on the right top side skin (fuselage was placed on the right side to ease bucking):
Inside view after both top side skins were riveted:
Top skin clecoed to aft fuselage assembly:
Inside view:
Yet another view (I got excited about this part and took lots of pictures):
About three dozen towels were placed on the floor of the aft fuselage to disperse our weight when we crawl inside. I didn't take a picture of my wife while she was in there - she's suffered enough indignities thanks to me, and one more would not have been well received:
View of the top skin, after riveting:
Side view:
Yet another view:
Left aft access panel, loosely attached (will need to remove for access in later sections, so no need to tighten screws). Notice that I chose the flush mount version rather than the version with protruding screw heads. If anyone from Van's reads this blog (probably not), I'd suggest making the flush mount standard and not an option. I had to special order the flush screws and nutplates, which weren't expensive, but just one more step that was really unnecessary. Since all the rivets in that area are flush, why not just make the access plates flush as well? I don't think it would cost Van's anything extra for this, since both versions still require 16 screws and 16 nutplates. Minor gripe, I know.
Right aft access panel:
Proud builder with a very large piece of the fuselage in his garage. This thing is already "yuge" - I can't imagine the size when it gets attached to the forward fuselage (okay I can, it will be 15.5' long), much less when the engine and prop are hung and the tailfins are attached (about 21' long in total). Where the heck am I going to store all these large parts in the interim? I wonder if my kids would mind sharing a bedroom henceforth ...


No comments:
Post a Comment